By the time most people think about how to protect solar panels, damage has already been done. Sure, solar panels are built to last and are often treated as a “set-and-forget” setup. But they’re not indestructible. Every home faces different risks. One might be in a hail-free zone, while another deals with frequent storms or heavy pollen. Those differences can change how vulnerable your system really is. Thankfully, keeping your system protected doesn’t have to be complicated. In this article, I’ll walk you through the key risks, along with simple and practical methods on how to keep your solar panels safe year-round.

Ways to Protect Solar Panels From Damage

Hailstorm Protection

Most solar panels can withstand hail. In fact, I’ve seen homeowners come out of a hailstorm with zero damage to their system, even when their roof took a beating.

However, this doesn’t mean panels are invincible. Hail ranks among the leading causes of severe weather-related insurance claims in the U.S., especially in states like Texas and Nebraska where storms are frequent and intense. Cracks can still happen, especially if hail hits at just the right angle or combines with strong wind.

That said, if you’re in a hail-prone region or just want peace of mind, here’s what you can do:

  • Adjust the tilt (if possible). Ground-mounted or tracker panels can sometimes be angled to reduce direct hail impact. But be careful, as adjusting the angle could increase wind exposure. Asking for professional guidance is recommended in this case.
  • Use hail nets or shields. These physical barriers can help absorb or deflect hail, especially in places where spring and summer storms are a yearly concern.
  • Stay alert during hail season. Follow the weather forecast so you’re not caught off guard.
  • Review your insurance policy. Many homeowner policies include hail damage, but make sure to double-check if that’s the case for you. You don’t want to find out the hard way that your coverage falls short.

Lightning Protection

Solar panels themselves don’t attract lightning, but the risk comes from poor grounding. If your system isn’t grounded properly, a single surge can destroy your inverter, damage your wiring, or worse, cause a fire.

In normal circumstances, homeowners don’t have to worry about lightning risks, especially if your system is installed by a licensed professional. Proper grounding and safety measures are built into the installation process and required by electrical codes.

Of course, there’s no harm in confirming this. Ask your installer if a lightning arrestor or any other surge protection device has been included to keep your system safe.

Surge Protection

Surges aren’t just caused by lightning. Grid switching, downed lines, and unstable power in rural or older neighborhoods can also send unexpected voltage spikes through your system.

Your solar panels themselves are not the weak link. It’s the inverter and your home’s sensitive electronics that take the hit.

That’s why surge protection deserves its own attention, even if you already have grounding in place.

To reduce this risk, talk to your installer about adding a surge protection device (SPD).

Type 1 or Type 2 SPDs, installed at your main panel or near your inverter, can help block these voltage spikes before they cause trouble.

And while you’re at it, take a moment to review your insurance policy. Some plans don’t cover surge-related damage unless specific protections are already in place.

Protection from Wildlife

You might not think twice about birds or squirrels when looking at your solar setup, but these critters are one of the sneakiest threats to your system.

They nest under your panels not just for shelter. They also chew wires, leave behind corrosive droppings, and sometimes dislodge panels or racking hardware.

And because these issues build up quietly, many homeowners don’t notice the damage until system performance drops or a major fault is detected. To stay ahead of costly damage, here’s what you can do:

  • Install wire mesh or critter guards. These barriers run along the edges of your panel array and block birds or rodents from nesting underneath, while still allowing airflow.
  • Watch for early signs of damage. Droppings, scratching noises, or visible nests under your panels are signs you should act quickly.
  • Call a professional. Poorly installed mesh protectors (as a result of DIY installation) can trap debris, cause rust, or damage the panel frame itself. Reach out to your installer (or a licensed wildlife control expert, if necessary) for help.

Rain Protection

Rain on its own won’t harm your solar panels. On the contrary, it can be beneficial as it helps rinse away dust, pollen, and other debris that would otherwise block sunlight.

The real risk comes when rainwater pools in areas it shouldn’t. On flat roofs or areas with poor drainage, standing water can slowly corrode wiring, mounts, or other hardware, which can lead to bigger problems over time.

Here’s how to avoid that:

  • Install panels at a tilt. Angled panels allow water to slide off naturally rather than collect underneath.
  • Keep gutters and downspouts clear. Clogged drainage can cause overflow that may affect nearby solar components.
  • Inspect drainage around your system. If water tends to pool in certain areas, ask your installer about possible design adjustments.

Protection From Dust, Dirt, and Debris

Dust, dirt, and debris are three of the most common reasons solar panels underperform, especially in dry areas, near farmland, or close to construction zones.

These elements can form a film that blocks sunlight from reaching the solar cells. That drop in output often goes unnoticed until a spike in your electric bill or a dip in your monitoring app alerts you.

Here’s how to keep your panels clean and clear:

  • Clean your panels regularly. For most homes, rinsing once or twice a year with a garden hose is enough to maintain performance. However, homes near farmland, dusty roads, or construction areas may need more frequent cleaning.
  • Avoid pressure washers. They can damage seals or crack the glass. For more, see our solar panel cleaning guide.
  • Trim nearby trees and vegetation. This helps prevent falling leaves, pollen, and other debris from collecting on or under your panels.

Fire Protection

Fires caused directly by solar panels are rare. In most cases, the real issue is electrical arcing, which tends to start from weak points like poor wiring or loose connections. These flaws can lead to overheating and eventually cause a fire.

Here are a few ways to reduce the risk of fire hazards around your solar system:

  • Confirm built-in fire safety features. Ask your installer whether your system includes arc fault detection and rapid shutdown devices. These are now required by most codes and can shut things down before a fault escalates.
  • Schedule inspections after major storms. Even if your roof looks fine from the ground, a professional check can catch wiring issues or loose connections that may not be obvious.
  • Clear out dry debris. Keep the area beneath and around your panels free of dry leaves, branches, or twigs, especially if you live in a wildfire-prone region.

For further information, make sure to check our guide on solar panel fires.

Flood Protection

Most rooftop panels sit high enough to avoid floodwaters. The concern lies with ground-mounted panels. If not properly sealed or elevated, these components can suffer from short circuits, inverter failure, and long-term corrosion.

If your solar system is in a flood-prone area, here’s how to keep it protected:

  • Ask your installer to raise key components above base flood elevation. A professional should make sure your inverter, wiring, and battery aren’t sitting where flood water can easily reach them.
  • Confirm enclosure protection. Ask your installer whether the enclosures are rated NEMA 4 or higher, as these are better at keeping water out.
  • Request a flood risk assessment. Your installer may recommend relocating vulnerable components or upgrading to more flood-resistant gear based on your property layout.

General Tips for Solar Panel Protection

Some protective habits are worth following no matter what type of threat you’re dealing with. Think of these tips as your solar system’s SOPs to prevent small issues from turning into bigger problems:

  • Disconnect solar panels when unused for extended periods. This prevents unnecessary wear on the system and reduces exposure to electrical risks.
  • Add your system to your home insurance policy. Most providers allow this at little or no added cost, but you’ll want it in writing.
  • Choose certified panels and parts. Standardized, well-rated equipment usually means better protection, easier repairs, and stronger warranties – something a certified solar installer can help you with.
  • Schedule a yearly inspection. Check for cracks, loose wiring, corrosion, or dirt buildup. If you’re working with a Solar EPC, they can handle these inspections as part of your routine maintenance plan.
  • Avoid experimental coatings or DIY sprays. Panels already use tempered glass, which is stronger than polymethyl methacrylate (PMMA) or plastic layers. Adding more may do more harm than good, not just to the panel structure but also to performance.
  • Call your installer when in doubt. Keep in mind that some fixes may void your solar warranty or introduce new issues. To be safer, check with a solar professional.

Install Your Home Solar Panels the Right Way

Always remember: No upgrade, fix, or workaround later on will match the reliability of a system that’s been installed properly from the start. A well-installed system runs quietly, performs efficiently, and rarely demands attention beyond routine checks.

And it all comes down to working with a certified solar installer – someone who can design your system to meet both your energy goals and long-term protection standards.

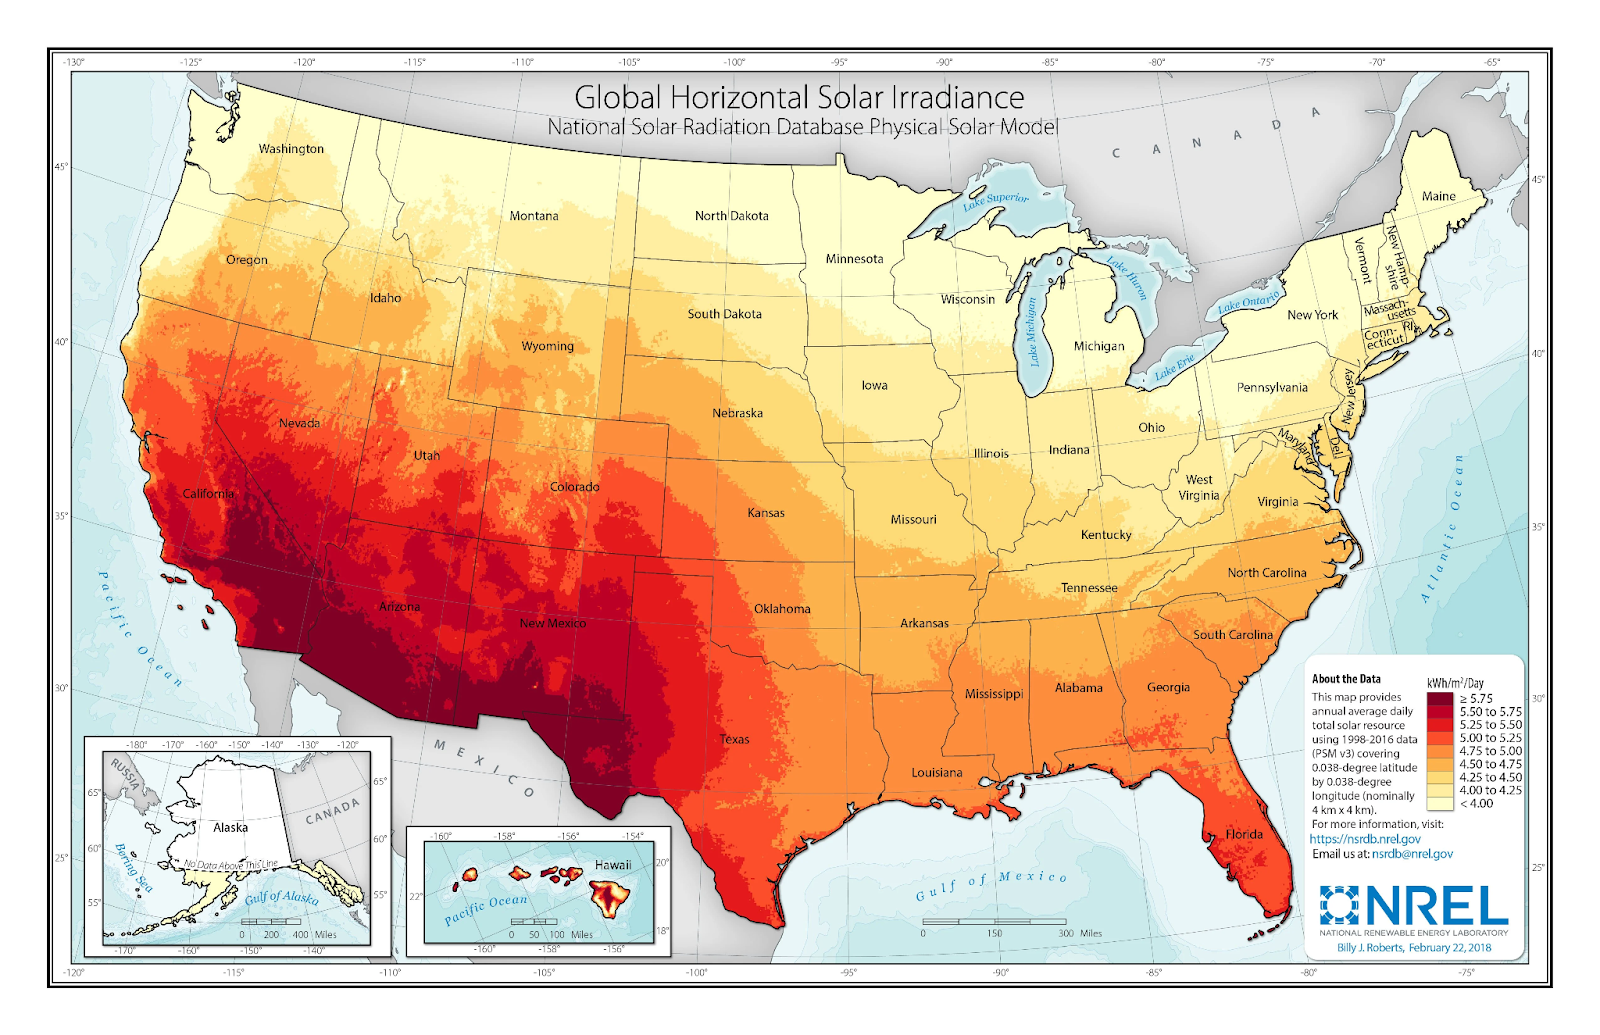
We at Avail Solar have installed home systems for hundreds of confident solar owners across Utah, Nevada, and Colorado. Request a quote today and see how we can help!

Posted in Solar 101

Ask any homeowner in Utah what’s stopping them from going solar, and you’ll almost hear the same thing: The upfront cost. And that’s understandably so, especially when that five-figure quote is staring you in the face Fortunately, that’s where Utah solar incentives come in to help you shave thousands off what you’d otherwise shell out. Better yet, most of these benefits stack, meaning you’re not just relying on one discount, but layering several together to make solar way more affordable than it looks at first glance. In this article, I’ll break down Utah’s current solar incentives and how they can work in your favor.

Utah Solar Incentives 2025

Residential Clean Energy Credit

The Residential Clean Energy Credit is a federal tax credit worth 30% of your total solar installation cost – including panels, inverters, labor, and even batteries.

This is arguably the most generous solar incentive available today. If your system costs $20,000, you’ll cut $6,000 straight off your tax bill. For emphasis, this is not a deduction or rebate, but a direct credit against taxes you owe.

To claim this incentive, you must file IRS Form 5695 with your federal tax return.

Keep in mind, however, that how much you can claim in a given year depends on your tax liability. The good news is that if your tax liability is lower than the credit, you can carry forward the remaining credit in future years. 

The federal solar tax credit is available to all U.S. homeowners through at least 2032 under the Inflation Reduction Act.

Net Metering in Utah

Net metering (or in some cases, net billing) is a utility billing program that lets you earn credit for the extra solar power your home sends back to the grid.

Here’s a bit of context: Most people use the most electricity after sunset, right when your solar panels stop producing. Net metering helps bridge that gap. Your overproduction during sunny hours doesn’t go to waste, but rather, gets banked as credits that help cover your nighttime and cloudy-day usage.

Essentially, it’s like trading your unused daytime electricity for future bill savings.

Now that that’s out of the way, the question then becomes: How much credit can you actually earn from it? It depends largely on your utility provider’s net metering policies.

  • Rocky Mountain Power (RMP): Uses net billing, where excess energy is credited at the utility’s avoided-cost rate (between 4 to 6¢/kWh, depending on the billing month)
  • Provo Power: Uses net billing, where they compensate excess solar generation at a fixed export rate of 6.7 cents per kilowatt-hour (kWh).
  • Murray City Power: Offers net metering, where every kWh you export is credited at the retail rate (1 to 1 net metering). 
  • City of St. George: Also on net billing. You’re paid for excess energy at wholesale market rates, not retail. Exact fees are available on their official website.
  • Heber Light & Power: Offers net metering. Compensation rates for excess energy are available on their official website.

As you can see, some utilities compensate for excess solar energy at full retail rate while others at a lower wholesale or avoided-cost rate. And that difference has everything to do with how much you’ll actually save.

But either way, these programs all help you recoup your solar investment and eventually shorten your solar payback period

Your solar installer will handle the interconnection paperwork and enroll you in your utility’s net metering program as part of the installation process.

Energy-Efficient Mortgages

Energy-Efficient Mortgages (EEMs) is a loan program that lets you roll solar costs into your mortgage, either when buying a new home or refinancing your existing one.

That means you can fund home energy upgrades without taking a separate loan, and spread the solar costs over 15 to 30 years, often at lower interest rates than personal loans or solar-specific financing.

Eligible upgrades typically include:

  • Solar PV systems
  • Battery storage
  • ENERGY STAR® appliances
  • Insulation
  • Energy-efficient windows and HVAC systems

To apply, you’ll need to work with a participating mortgage lender. Let them know you’re interested in an EEM, and they’ll guide you through eligibility and documentation (usually including a home energy audit to verify savings):

  • If you’re using an FHA or VA loan, you can ask the lender if they can add an EEM feature. 
  • For conventional loans, ask if they support Fannie Mae’s HomeStyle® Energy product.

Battery Storage Incentives in Utah

If you’re already thinking about investing in a solar battery (or looking for reasons to invest in one), know that – apart from the 30% federal solar tax credit – another way you can get “paid” for a home solar battery is through Rocky Mountain Power’s Wattsmart Battery Program.

The Wattsmart Battery Program rewards homeowners for letting the utility tap into their battery storage during periods of high grid demand, such as during hot summer afternoons or winter peaks. In return, you get paid for every kilowatt of storage capacity your battery provides.

Here’s how you can benefit from this program:

  • Enrollment Incentive: Upfront cash payment of $400 per kilowatt (with a $2,000 cap per household)
  • Annual Bill Credits: $15 per kilowatt (starting in the 2nd year of the program)

To qualify, you must be an RMP residential customer. Moreover, your battery must be from the utility’s approved equipment list.

Is the Renewable Energy Systems Tax Credit Still Available?

No, Utah’s former state-initiated solar tax credit is no longer available for homeowners. The program, officially known as the Renewable Energy Systems Tax Credit (RESTC), ended for residential systems installed after December 31, 2023.

That means if you installed your solar panels in 2024 or later, you won’t be able to claim any state tax credit from Utah.

Why Am I Not Getting My Full Solar Tax Credit?

If your federal solar tax credit isn’t as big as you expected, the most common reason is that you didn’t owe enough in taxes. If your tax liability is too low for the year, you won’t be able to claim the full amount in the first year. However, you can roll over the unused portion for future years.

Is Solar Worth It in Utah?

Yes, solar is absolutely worth it in Utah. If you pause for a second and look beyond just the price tag, you’ll see why going solar makes sense in Utah, not just on paper, but also in practice:

  • Electricity prices aren’t staying put in Utah. In just one year alone from early 2024 to early 2025, average residential electricity prices in Utah rose from around 10 cents to nearly 12 cents per kilowatt-hour – a 20% jump. Going solar lets you lock in a steady cost for years to come, softening the blow of such price hikes.
  • Homes with solar sell for more. That means if you ever decide to move, you’re more likely to sell your home quicker and for a better price.
  • Utah gets about 5.5 peak sun hours per day. That’s more than New York, Massachusetts, and even parts of California. More sunlight means more energy from your system, faster payback, and better long-term savings.

Final Thoughts on Utah Solar Incentives

If you’ve done some prior research, you might have noticed that Utah doesn’t exactly roll out the flashiest rebates like states such as California, New Jersey, or New York.

But here’s the thing: Incentives are just one part of the equation. What really makes or breaks your solar savings is how well your system is designed – from panel placement to inverter choice to matching your usage patterns. And that’s something a reputable solar installer can help you get right.

If you want to know what a well-designed solar system tailored to your home’s energy needs could actually cost you in Utah, request a quote today. We at Avail Solar have installed hundreds of systems across the state, and we’re confident we can give you a price that fits both your goals and your budget. 

Posted in Solar 101

If you already see the value solar provides and are ready to move forward, you likely now face the next big decision: Choosing the right provider through the solar proposals you receive. Here’s the thing. It’s not always apples to apples. Proposals can differ in scope, assumptions, and the level of detail, and that’s where things can either go smoothly or leave you scratching your head. Having worked on several home solar projects throughout Utah with Avail Solar (and having prepared many of those solar proposals myself), I wrote this article to walk you through exactly what a proposal should include. More importantly, I’ll point out which details you need to pay attention to so you can tell whether the offer in front of you truly fits your home and situation. After all, this isn’t a project that sits on your roof for a week, but one that’ll likely stay with your home for decades.

What’s Included in a Solar Proposal?

These are the key elements you should clearly look into once you receive a solar proposal.

System Size (kW)

System size, measured in kilowatts (kW), refers to the total power output your solar system can produce at full capacity. In most proposals, this will be one of the first numbers you see, often shown as something like “6.2 kW system.”

This number matters because it gives you a snapshot of how much electricity your system could generate, but it should ideally line up with your actual energy use at home. Too small, and you fall short. Too big, and you might be overspending for power you won’t use.

I wrote a separate guide on how to size your solar system. You can use it to check whether the system size listed in your proposal actually makes sense based on your household’s energy needs.

Estimated Annual Production (kWh)

Estimated annual production refers to the amount of electricity your solar system is expected to generate over a full year, expressed in kilowatt-hours (kWh).

Because it’s in the same unit as your utility bills, it’s easy to compare this number against your past energy use and see how well the system is expected to cover your needs.

Keep in mind that a thought-through solar proposal won’t just give you a single yearly estimate. It will usually include a month-by-month breakdown, either in table form or as a graph. This lets you see how your solar production might rise or dip throughout the year.

Even better, most proposals will show this production estimate right next to your own historical energy usage. That way, you can immediately see how well the system is expected to meet your actual needs (solar providers will usually ask for your recent utility data to do this).

It’s also fair to expect the proposal to clearly state what assumptions were used to come up with these numbers. That includes shading losses, orientation of your roof, and local weather patterns, among other things.

Project Site Layout

The project site layout is a visual representation of how your solar panels will be positioned on your roof (or elsewhere on your property), a bird’s-eye view showing where each panel will go, essentially.

If you look a bit deeper, this layout also shows surrounding buildings, trees, and other potential obstructions that may create shading, along with the direction your panels are facing, which also affects your production.

This matters because it gives you added context for the assumptions made earlier in the simulation used to estimate your annual production.

Estimated Savings, ROI, and Payback Period

A well-prepared proposal should show you the dollar outcomes clearly, because beyond the goal of cutting down carbon, solar is, first and foremost, an investment. That being said, you can expect to see:

  • Estimated savings: Usually refer to how much you’ll avoid paying the utility over your panels’ lifespan (around 20 to 25 years). These are often shown in dollar amounts, either as a lump sum or year-over-year comparison.
  • Payback period: Tells you how long it might take for your savings to equal the cost of your system, or essentially, when your system has paid for itself.
  • Return on Investment (ROI): Gives you more financial lens to compare your solar system with other big-ticket investments, like home renovations or even stock market returns.

These often show up as tables, bar graphs, or line charts in your proposal, helping you see how your money moves over time.

On this note, it helps if the proposal also states upfront any assumptions about rising electricity costs, since even a small utility escalator can quietly shape how realistic those savings projections really are.

If you want to understand exactly how these numbers are calculated, I wrote a full article breaking down solar panel return on investment. It’ll hopefully help you do your own math to see whether the savings in your proposal are realistic or inflated.

Financing Options

Like many solar companies, we, at Avail Solar, work with trusted financing partners to make solar more accessible. Because let’s face it, solar isn’t exactly cheap by any means, and most homeowners need flexible options to make it work.

That’s why your proposal should clearly show:

  • Who the financing provider is
  • How many payments you’ll be making (and how often)
  • The exact dollar amount per payment.

You’ll usually get a visual breakdown as well, a simple cash flow chart showing what you’re expected to pay over time and how that compares against projected savings.

Some proposals may also include options like solar leases or Power Purchase Agreements (PPAs), which sound great upfront since they often come with zero initial cost.

However, they could end up costing you more in the long run, especially because you won’t own the system. If you want the full picture, I wrote an article on how solar panel leasing works, where I also explain why, personally, I’m not a fan of these types of solar contracts.

Total Cost of Your System

The total cost of your solar system is, of course, a major detail. But don’t just stop at this headline figure.

You’ll want to check if the math includes solar incentives, like the 30% federal tax credit or any state/local programs, which can cut thousands off the final amount. These should be clearly stated in the proposal.

Another useful figure is cost per watt ($/W), which is one of the simplest ways to compare pricing across different offers. Some proposals leave it out, but you can calculate it yourself: Just divide the total system cost (before incentives) by the system size in watts.

Panel and Inverter Brands/Models

Imagine being promised premium, high-efficiency equipment in your proposal, only to find out later during installation that you’re getting something else entirely. It happens, and many times, it’s not even intentional.

That’s why it’s worth knowing exactly what equipment you’re getting upfront, especially since quality often isn’t broken down line by line, but rather rolled into the total system cost.

Panels on the higher end typically have higher efficiencies, stronger warranties, and better manufacturer backing. As for inverters, microinverters, string inverters, and hybrid setups each come with their own pros and tradeoffs.

If product data sheets aren’t included in the proposal, you can always request them directly from the solar provider. These documents give you a deeper look into the specs and certifications of the equipment being offered.

Warranties and Guarantees

Another item usually bundled into your total system cost is the warranty coverage, which is something you shouldn’t overlook, especially since solar is meant to last decades:

  • Product warranties usually come from the panel and inverter manufacturers and cover defects in materials or workmanship. These often run for 10 to 25 years.
  • Performance warranties guarantee that your solar panels will continue producing at a certain percentage (typically 80% or higher) of their original capacity by year 25.
  • Workmanship warranties are offered by the installer and cover labor-related issues, like improper mounting or wiring mistakes. These vary by company but often range from 5 to 15 years.

If you want a deeper dive into what each of these warranties covers (and what they don’t), check out our full guide on solar panel warranties.

Project Scope

One area that often causes the most friction down the line is the project scope. This is the part that outlines what your installer is actually responsible for, and what they aren’t.

This matters because some of the biggest misunderstandings happen when homeowners think something is included, only to find out later it’s not. That’s where those “hidden cost” surprises often come from.

That said, here are a few key things your proposal should spell out clearly:

  • Who handles what: Does your installer take care of solar permitting and HOA approvals? What about any fees tied to that? Will they assist with post-installation support, like monitoring setup or panel cleaning?
  • Timeline expectations: What’s the estimated schedule for permitting, installation, and final grid interconnection? Delays can happen, sure, but your proposal should at least give you a baseline so you’re not left unclear when things will move forward.
  • Aesthetic considerations: Did the installer take time to ask about your preferences? That could include choosing all-black modules, using conduit runs that are less visible, or adding array skirts to make your system blend in better from the curb.

Solar Company Details

Most proposals will include a quick blurb about the company offering the installation. That’s pretty much standard. But don’t just take those statements at face value, because what a company says about itself and what its customers experience can be two very different things.

That said, I always recommend doing your own research. And one of the best ways to do that is to give them a call. Ask direct questions and pay attention to how they respond. I put together a guide on questions to ask solar companies that you can use as a reference if you’re not sure where to start.

Solar Proposals Vary by Home

If your cousin in another state (or even just a few neighborhoods away) tells you they got solar for way less or with different equipment, don’t be surprised if your proposal looks nothing like theirs. Here are 5 reasons why no two solar proposals are the same:

  • Electricity rates, annual inflation, and average sunlight hours differ by region, which means the same system in one state might produce more or less in another.
  • Different installers may use different assumptions or tools in their simulations, which can lead to wide variations in projected energy production.
  • Some panels are more efficient and degrade more slowly over time, but they may cost more upfront. What you’re quoted depends heavily on what you’re being offered.
  • Some proposals include extras like batteries, monitoring, or extended warranties. Others leave these out or treat them as optional add-ons.
  • Not all proposals are equally transparent. Some give you every number and assumption up front, while others bury critical details or gloss over them entirely.

If you already have a reference proposal from another installer, you can always bring it to your current provider. Avail Solar, for instance, will help walk you through the differences and explain whether there’s room to match the offer or if your system needs a different setup.

Get Solar Proposals That Match Your Needs

By now, you’ve seen what goes into a well-prepared solar proposal and how the real focus should be on how well the proposal fits your home, usage, and long-term goals, not just the price tag. 

So before saying yes to anything, make sure you’ve asked the right questions, got a second opinion, and taken the time to really think it through.

And if you’re ready to request a quick proposal (or want something more competitive than what you already have), reach out to Avail Solar and request a quote today!

Posted in Solar 101

If you’re installing a grid-tied solar system for your home, chances are you’ll rely on a certified installer to figure out the technical stuff, including how big your system should be. But if you’re the type who wants to get to the bottom of how sizing works before anyone starts quoting you with numbers (especially when every extra kilowatt can add thousands to the total cost), you’re in the right place. In this guide, I’ll walk you through how to size your home solar system step-by-step, so you can double-check whether your installer’s proposal makes sense.

How to Size a Solar System in 5 Steps

Step 1: Know Your Average Monthly Energy Use (kWh)

A good approach to determining a solid baseline for your household energy use is by collecting your last 12 months of electric bills and checking the monthly kilowatt-hour (kWh) usage. From there, take the average of those 12 months.

Averaging smooths out those highs and lows, especially considering consumption spikes in summer when the AC runs all day, and again in winter with heating.

Now, you could also begin by looking at your budget or available roof space (we’ll cover those later). But averaging your last 12 months of energy use is arguably the most reliable method for estimating your solar system size since it’s based on actual data and not assumptions.

Step 2: Convert Monthly Use into Daily Average

Now that you’ve got your monthly average from Step 1, the next step is figuring out your daily usage. Simply divide your monthly average by 30.

Say your average monthly use is 900 kWh (which is roughly the average energy consumption for a U.S. household), then your average daily use amounts to: 

900 kWh ÷ 30 days = 30 kWh per day

That means, if you’re planning to offset 100% of your usage, your solar system needs to be capable of producing 30 kWh per day as well.

In a sense, you now have a rough idea of what your system should cover daily, and thus its “size”. However, this doesn’t give the full picture because when we talk about solar system size, we refer to it in kilowatts (kW), not kilowatt-hours (kWh).

To close the loop, we’ll use your average daily usage alongside your location’s sun hours, as we’ll do in the next step.

Step 3: Account for Your Location’s Sun Hours

Average daily sun hours is a measure of how many hours per day the sun is strong enough to generate power. You can find your area’s average sun hours using this solar irradiance map from the National Renewable Energy Laboratory (NREL). 

The goal is to use this number to get the kW size of your system. Let’s do some simple math. For instance, say, you’re installing a solar system for your house in Utah, which receives roughly 5.5 peak sun hours on average based on the NREL map above. Now use this formula to come up with your system size in kW: System Size (kW) = Daily kWh Needed / Daily Sun Hours So: 30 kWh / 5.5 sun hours = 5.45 kW Now, you’ve got a solid number for your home solar system size. But, we don’t stop there… Step 4: Account for Solar Panel Inefficiencies Not all of the energy your solar system could generate on paper actually makes it to your appliances. That’s because there are real-world inefficiencies you need to factor in, such as:

  • Panel degradation over time: Solar panels naturally lose efficiency as they age. Most solar warranties hint at this, often guaranteeing around 80–85% output after 25 years.
  • Shading throughout the day: Trees, chimneys, or nearby buildings can cast shadows on your panels at certain times, reducing their output.
  • Roof orientation and tilt: If your roof isn’t angled or oriented in a way that gets the best sunlight, your system won’t produce at its full potential.
  • Unpredictable weather: Even in sunny regions, cloudy or rainy days can lower how much sunlight your panels get.
That said, it’s wiser to take a more conservative approach to avoid undersizing. A common practice among solar installers is to build in a performance buffer by increasing the estimated system size, typically by about 20%. So, if your system size came out to 5.45 kW in Step 3, here’s how it should look now: 5.45 kW x 1.20 = ~6.50 kW This new number should give you peace of mind knowing your system will stay net positive throughout the year, even with occasional dips in output caused by those aforementioned inefficiencies. Step 5: Convert kW System Size into Number of Panels From Step 4, you know you need a 6.5 kW system — great, but what does that actually look like? Most residential solar panels today produce between 350 to 450 watts each. Let’s say you’re going with 400-watt solar panels. That means a 6.5 kW home solar system would translate to: 6,500 watts / 400 watts per panel = ~16 panels If your panels are roughly 6.5 ft by 3.3 ft, you’ll need about 350 square feet of roof space.

Other Considerations for Sizing a Solar System

Budget

Even if your roof could fit 30 panels, your wallet might say otherwise. That’s why many homeowners start with their budget, then work backwards to figure out what kind of system they can afford. 

Let’s say your total budget is $7,000. If you qualify for the 30% federal solar tax credit, your actual install budget is effectively:

$7,000 ÷ (1 – 0.30) = ~$10,000 total system cost before credit

Assuming an average installed cost of $3 per watt, that gets you a system around:

$10,000 ÷ $3/watt = ~3.33 kW system

If your home uses 30 kWh per day, and you live in a place with 5.5 sun hours, then:

3.33 kW × 5.5 sun hours = ~18.3 kWh/day

That setup would cover around 60% of that usage — not too shabby, especially when you’re trying to keep upfront costs down. And hey, nothing’s stopping you from expanding your system later on when the time’s right. 

Roof Space

Remember earlier when we said you could fit 30 panels? That’s only if your roof layout has enough real estate — and I’m not exactly talking about your roof’s literal square footage…

Rather, what I mean is usable roof space. Sure, your roof might look big enough on paper, but once you factor in split levels, add angles, and roof obstructions like vents and chimneys, the actual area you can use for panels shrinks fast.

(I covered this in more depth in a previous article: How Many Solar Panels Can Fit on My Roof, in case you’re curious to learn more.)

If you really want your system size to match your actual needs, but your roof’s usable space is limited, you’ve got two solid workarounds:

  • Use higher-efficiency panels to squeeze more power out of each square foot
  • Consider a ground-mounted system if you’ve got the yard space

Geographic Location (Sunlight)

We already touched on this back in Step 3, but just in case it wasn’t clear: Where you live plays a huge role in how much sunlight your panels get — and that sunlight is what powers your system in the first place.

The more direct sunlight your panels receive, the more electricity they can generate.

That’s why someone in Arizona might need a smaller system than someone in Michigan to cover the same energy usage.

Battery Storage

If you’re planning to add a solar battery, say, for nighttime use, you’ll need to size your system a little larger to cover both your daytime consumption and the extra energy needed for charging.

Whether adding a battery is worth sizing up your system for is a rabbit hole for another day. But it’s worth mentioning that solar batteries tend to last a long time, and better yet, you could qualify for battery-specific rebates or incentives just by having one, which can make the math a whole lot more appealing.

Utility Arrangements

Depending on your local utility’s policies, your solar setup may interact with the grid in very different ways. And that interaction can directly affect how big or small your system should be.

If your utility offers true net metering, where any excess energy your panels produce is credited at the same retail rate, sizing your system all the way up to 100% coverage or more can make sense.

Now, if we’re talking about rate plans, that’s a whole other layer to consider when thinking about system size.

For example, if your utility uses Time-of-Use (TOU) rates, where electricity costs spike typically during mid-afternoon to evening hours, a battery may help you avoid those spikes. And as I mentioned earlier, adding a solar battery could influence whether you decide to size up your system just a bit more.

What Is a Good Size for a Home Solar System?

There’s no perfect number for the ideal solar system size. The “right” size is the one that actually fits your energy goals (whether you’re aiming for 100% offset or just partial coverage) and stays within your budget. 

That said, if you’re looking for a ballpark range, know that the median size of home solar systems in 2023 is around 7 kW.

How Do I Factor in Future Changes in My Electricity Consumption, Such as Adding an EV?

If you’re buying an EV, expect an extra 3,000 to 3,800 kWh per year in usage, which translates to an additional 3 to 4 more panels.

In general, if you’re thinking about future upgrades like installing a heated swimming pool, converting to electric heating, or adding a second EV charger at home, keep in mind these three things:

  • Add a buffer when sizing
  • Install conduit and space for future expansion
  • Choose an inverter that can accommodate future panel additions

We installers call this solar-ready planning, and it could save you from a costly redesign later.

Can I Add More Panels Later If I Initially Undersize My Solar System?

Yes, you can add more panels later on for future expansion. However, make sure that you have:

  • An inverter that can handle the added capacity
  • Enough unshaded roof space (or yard space, if you’re considering ground-mounted panels)
  • Approval from your utility to increase system size

If you’re working with a solar installer, let them know upfront that you might expand. That way, they can design your system with that in mind.

Need Help Sizing Your Home Solar System?

Avail Solar has installed hundreds of home solar systems across the U.S., from Utah and Colorado to Nevada and Idaho. We’re dedicated to helping homeowners like you get the right-sized setup for your usage and budget, whether that means full coverage or just offsetting a portion of your energy needs. Request a quote today!

Posted in Solar 101

What is a Hybrid Inverter?

If you’ve done any research on solar or sat through a pitch from a solar company, chances are you’ve already come across the term hybrid inverter, alongside other inverter types like string inverters or microinverters. Hybrid inverters represent a newer generation of solar technology. While newer doesn’t always mean better across the board, in specific cases — like preparing for battery storage — they can offer an advantage. In this article, I’ll walk you through what a hybrid inverter is, how it works, and its pros and cons compared with traditional inverter setups.

What is a Hybrid Inverter and How Does It Work?

A hybrid inverter is a type of inverter that can handle both solar panel input and battery storage — all in one unit. To be more specific:

  • It converts solar DC energy into home-ready AC electricity, just like traditional string inverters do.
  • It can send energy to charge a battery and pull energy from that battery to power your home when needed

It does everything a standard inverter does, converting power and exporting excess energy to the grid, but being able to switch intelligently between sources (solar, grid, battery) depending on your home’s needs — a “smarter” version of the traditional inverter, basically.

How is a Hybrid Inverter Different From a Regular Inverter?

The biggest difference between a hybrid inverter and a regular inverter arguably comes down to battery readiness and energy management.

With a hybrid inverter, you have a smart traffic cop that directs power to the most efficient path. Depending on your goals and preferences, it may:

  • Send solar power to your home first, and then store any extra in the battery
  • Prioritize charging your battery first — ideal if you want backup power during frequent outages
  • Only send excess power to the grid after the battery is fully charged
  • Pull power from the battery at night or during expensive time-of-use pricing periods

On the other hand, a regular grid-tied inverter simply converts the DC power from your solar panels into AC power for your home and the grid — and that’s it.

It doesn’t know or care about your battery. It doesn’t prioritize it, manage it, or optimize how or when it’s charged or discharged. It just pumps out AC power, regardless of your energy strategy.

Benefits of a Hybrid Inverter

Okay, cool, a hybrid inverter can do all that. But is it really necessary?

If you’re thinking about going solar and are already pretty dead set on adding a battery soon, then yes, you’re likely better off choosing a hybrid inverter.

Here are three main pros that highlight why:

Cleaner, Simpler Solar Setup

With a hybrid inverter, everything — your solar panels, your battery, and the grid connection — is managed by one unit. This means fewer components, cleaner wiring, and an overall simpler setup.

Meanwhile, for a traditional string inverter to achieve this kind of energy management functionality, it needs to be paired with a smart battery system.

That alone, at first glance, already tells you that you’re dealing with two separate systems that have to work together — one handling solar, the other handling storage. And that naturally leads to more wiring, more hardware boxes, and more potential points of failure over time.

To be fair, this alternative route works perfectly fine. In fact, it’s what I’ve seen with most solar customers, especially those who either added a battery much later or took over an existing system they’re looking to retrofit.

Higher Efficiency

Looking at energy conversions from a theoretical angle, every time energy changes from DC to AC or vice versa, a little bit gets lost as heat. The more conversions there are, the more energy you lose.

So in terms of efficiency, fewer conversions usually mean better performance. 

A hybrid inverter converts energy only twice.

  • The inverter takes DC energy from your panels and stores it directly into your battery — still in DC.
  • Later, when your home needs it, the inverter converts it once into AC to power your appliances.

One conversion in, one conversion out.

Meanwhile, in a string inverter plus a separate smart battery system setup:

  • The inverter takes DC energy from your panels and converts it to AC.
  • The smart battery’s inverter converts that AC energy back into DC to charge your battery (because batteries store energy in DC, not AC).
  • When your home needs that stored energy, the battery’s inverter converts the stored DC energy back to AC.

That’s three conversions instead of two, making hybrid inverters slightly more efficient than this setup.

The difference might not seem all that dramatic if you’re looking at just a single moment of energy transfer. But remember, we’re talking about energy conversions that happen every day, over and over again. Over time, those little bits of energy loss add up.

That’s why hybrid inverters tend to edge out in performance when it comes to battery integration.

Unified Control

When we say “unified control,” we mean having the ability to manage everything from a single platform.

Hybrid systems often make this super simple. Most hybrid inverters come with their own app or dashboard, giving you a real-time view of how much power you’re generating, storing, and using.

Now compare that with a traditional setup where you pair a string inverter with a smart battery. In this case, you’re dealing with two separate systems. That usually means two different interfaces, which can feel less streamlined and a bit more clunky when you’re trying to track everything or make adjustments.

Disadvantages of Hybrid Inverters

Below are the cons and drawbacks of hybrid inverters.

One System Means One Single Point of Failure

This, I would say, is the most critical drawback of hybrid inverters. We’ve talked a lot about the convenience of having everything handled by a single unit, but that same convenience can also be its kryptonite.

If that one unit fails, everything goes down with it — your solar, your battery, and your grid syncing.

With a dedicated inverter for solar and a separate one for your battery, at least your battery could still charge and step in during outages, even if the solar side of the system has issues.

You Can’t Use It to Upgrade an Existing System

If someone already has a solar setup with a traditional string inverter, it doesn’t really make practical or financial sense to rip it out and replace it with a hybrid inverter just to add a battery. At that point, going with a smart battery that comes with its own inverter is often the simpler and more cost-effective route.

Battery Compatibility Can Be Limited

If you already have a specific battery in mind, it’s worth double-checking whether it’ll work with the hybrid inverter you’re planning to use. Some inverters only support certain battery brands, so if there’s no match, you might have to either change your inverter or go with a different battery entirely.

Can a Hybrid Inverter Work Without a Battery?

Yes, you don’t need a battery to use a hybrid inverter. Without one, it works a lot like a traditional inverter: It converts solar DC into usable AC and sends any excess power to the grid.

In this case, you’re not using it to its full potential just yet. Again, the real strength of a hybrid inverter lies in its ability to manage battery storage, which means without a battery, you’re only tapping into part of what it can do.

The good part is that in this case too, you have flexibility. You can start with solar now and easily add a battery later without needing to do much reconfiguration to your system.

How Long Do Hybrid Inverters Last?

Hybrid inverters typically last around 10 to 15 years, which is about the same as most string inverters. For comparison, microinverters tend to have a longer lifespan, often lasting up to 20 years.

How Do Hybrid Inverters Handle Power Outages?

If paired with a battery, the inverter detects an outage and switches to stored power instantly, usually within milliseconds. That means you can expect a truly automatic switchover so fast you won’t even notice the power went out.

Do Hybrid Inverters Require Maintenance?

Yes, hybrid inverters still require maintenance, but not much. However, since they handle both your solar system and your battery, it could be worth checking occasionally to make sure the unit is free of dust, ventilation isn’t blocked, and there are no error lights or app alerts.

Some models update firmware automatically, so in most cases, that part takes care of itself.

Final Thoughts

Going with a hybrid inverter makes a lot of sense if you’re planning to install a battery soon. It keeps everything clean and simple — one unit, one installation, ready for storage now or later.

That said, if you’re not 100% sure about adding a battery yet, no worries. Like I mentioned earlier, you can absolutely stick with a traditional setup and still add a battery later using a smart battery system. It’ll take a bit more work and wiring, but for a certified solar installer like us, it’s nothing out of the ordinary.

Still, here’s something worth thinking about: Maybe you don’t need a battery today because your utility offers full retail net metering. But that could change. 

Case in point: Arizona transitioned to net billing in 2016, Utah in 2017, and more recently, Idaho followed suit in 2023. All three now pay homeowners less for the solar they export to the grid.

What this means is, storing your own solar power instead of selling it back could be the smarter financial move going forward.

If you’re curious how a battery might fit into your solar setup, get in touch. We at Avail Solar would love to walk you through your options in a quick, friendly chat.

Posted in Solar 101

When we picture the winter season, most of us imagine our roofs buried in snow, the biting cold that lingers, and the sun barely making an appearance. And so, the idea of solar energy during this time can feel a bit counterintuitive. But contrary to popular belief, solar panels do still work in winter, which means the value of going solar doesn’t disappear — and your investment doesn’t go to waste. Read further as I walk you through the facts about what happens to solar during winter, and how they continue to produce energy even when it’s cold and overcast outside.

Do Solar Panels Work in Winter?

Yes, solar panels absolutely work in winter. As long as there’s sunlight, your panels will keep generating electricity — because what they need is light, not heat.

Side note: I’ve actually stressed this a lot in a previous article, Do Solar Panels Work on a Cloudy Day?

Here are three facts that show why winter doesn’t actually stop your system, and how, in some cases, it might even give it a bit of an edge.

Solar Panels Run on Sunlight, Not Temperature

This might be the biggest misconception out there. As I mentioned, solar panels don’t need warm weather to function. They need photons, which come from sunlight. Even in winter, the sun still shines (albeit for shorter hours), and that light is enough to keep your system going.

To put this in perspective, take a look at Minnesota and Michigan. Both states experience harsh winters, yet still rank among the top 20 solar states in the U.S., according to the Solar Energy Industries Association (SEIA).

Solar Panels Are More Efficient in Cold Weather

Building on the previous point about solar panels not needing heat to function, it might surprise you that they’re not particularly fond of high temperatures either.

In fact, excessive heat can reduce their voltage, which in turn slightly lowers their efficiency.

Most solar panels are tested at a standard temperature of 77°F (25°C), but for every degree Celsius above that, their efficiency drops slightly. This drop is measured by what’s called the temperature coefficient — usually around -0.3% to -0.5% per °C, depending on the panel brand.

For example, if your panels are operating in 30°C (86°F), that’s 5°C above the test condition of 25°C (77°F). With a temperature coefficient of -0.3% per °C, this means you’d lose about 1.5% efficiency due to the heat.

So if your panels are rated at 21% efficiency under ideal conditions, they’d drop to around 19.5% efficiency under those warmer temperatures.

In contrast, colder temperatures reduce internal resistance. That means with less heat to push against, panels convert sunlight to electricity more effectively.

The ‘Albedo Effect’ Can Actually Increase Solar Output

When sunlight hits snow-covered surfaces, that light reflects back upward — a phenomenon called the albedo effect.

That extra reflected light can bounce onto your panels and boost the amount of energy they take in. In theory, the more they absorb, the more electricity your system can generate.

Do Solar Panels Work With Snow on Them?

Yes, solar panels can still work when covered in snow — but only if the snow isn’t entirely covering them. A thin dusting probably won’t affect that much, but a heavy blanket of snow can temporarily block sunlight from reaching the panel.

Fortunately, solar panels are usually installed at an angle, so when the sun comes back out, most of the snow begins to melt and slide away on its own. Helping this along is the fact that panels are built with smooth, tempered glass, which makes it harder for snow to stick in the first place.

They also generate a bit of heat while operating, which, combined with their dark surface absorbing sunlight, helps them shed snow faster than the surrounding roof.

How Well Do Solar Panels Work in Winter?

During winter, solar panel production can drop to about 30% to 50% of a system’s rated capacity. So if your system typically produces 900 kWh in July, you might only see around 270 to 450 kWh during the colder months.

Do take that with a grain of salt, though, because how much less energy your system produces in winter depends on several factors:

  • Daylight Hours: States with more peak sun hours tend to generate significantly more energy than those with fewer.
  • Cloud Cover: The cloudier it gets during winter, the tougher it is for direct sunlight to break through. And when light intensity drops, so does your system’s energy production.
  • Snow Cover: As mentioned, panels can occasionally get covered in snow. In rare cases where snow completely blocks sunlight, energy production ca nosedive, similar to how shading from trees or nearby structures can reduce output.

Even with all of that in mind, here’s why you shouldn’t worry.

Remember that a well-designed solar system is built to match your household’s energy use across all seasons. Combine that with net metering, and the energy your system overproduces during sunnier spring and summer months can be banked as credits to offset those dips in winter production.

So even if your panels generate a little less in the colder months, your annual performance still stays on track.

And speaking of ‘staying on track’, there are things you can do to keep your panels performing at their best during this low-yield season.

Ways to Keep Your PV Panels Performing Well in Winter

Use a Solar Snow Rake to Remove Buildup

If snow buildup is blocking light for days, you can gently remove it using a solar-safe brush or a roof rake with a soft rubber edge. Never use metal tools (like a shovel) or pressure washers as they can scratch or crack the glass surface.

Avoid Dangerous DIY

Don’t climb on an icy roof just to brush snow off panels. The energy gain isn’t worth the risk. As mentioned earlier, using a solar-safe snow rake from the ground is a much safer alternative if clearing snow becomes necessary.

Better yet, call a professional solar panel cleaning or maintenance team instead to do the job. 

Trim Nearby Trees

Since the winter sun rides low, even small shadows can cut down energy production. By trimming branches in late fall, you help maximize the light your panels can catch during shorter days. This is especially important in neighborhoods with mature trees.

Consider Oversizing Your System

Slightly oversizing your system can help you generate extra energy during the sunnier months — especially useful if your utility offers net metering. Those summer overages can turn into bill credits that help offset the dip in winter production.

This, I would say, is something you shouldn’t worry so much about. Certified solar installers like us will handle your system’s sizing based on your year-round energy use.

Explore Tracking Systems (If Applicable)

While residential rooftops don’t usually come with adjustable mounts, ground-mounted systems sometimes do. Dual-axis tracking systems can tilt and rotate to follow the sun throughout the day and year — including adjusting for that low winter sun angle.

Do Solar Panels Crack in Cold Weather?

No, solar panels don’t crack in the cold winter weather since they are engineered to resist very low temperatures. In fact, they undergo rigorous testing under standards like IEC 61215 and UL 1703, which includes the Thermal Cycling Test

Here, panels are subjected to temperature fluctuations between 40°C and +85°C for 200 cycles to simulate real-world thermal stresses.

Avail Solar proudly installs panels from REC, Hyundai, and QCells, all certified to meet these standards.

Winter Solar Works With the Right Design

Winter production dips — that’s expected. But that dip can be balanced out by the extra energy your system produces during sunnier months. It all comes down to one thing: A solar system tailored to your home’s consumption.

At Avail Solar, we build home solar systems that are ready not just for the winter, but for the entire year. Our team has installed hundreds of home solar setups across Utah, Nevada, and Colorado, all designed around seasonal shifts and real household energy needs.

Request a quote today or call us to get started

Posted in Solar 101

If you’ve spent any time learning about net metering, chances are you’ve come across something called the solar true-up bill — or if not, you probably will at some point.  Even so, it’s one of those things that doesn’t get much attention upfront, but can catch you off guard if you’re not prepared for it. And while most homeowners are familiar with their monthly utility bills, the true-up bill works a little differently. So in this article, I’ll explain exactly what it is, how it ties into net metering, and what you can expect.

What is a Solar True Up Bill?

A solar true-up bill is a statement from your utility that sums up all the energy you’ve sent to the grid and taken from the grid over a 12-month billing cycle. Essentially, it settles the difference between what your solar system produced and what your home used over the year.

A typical solar true-up statement includes several important data points:

  • The total amount of electricity your system produced
  • The total energy your home consumed
  • Net energy metering credits earned and used
  • Any remaining balance due or credit surplus
  • Charges for grid access, delivery, or other fixed fees

If the process sounds a bit confusing — sending energy to the grid, pulling it back, then settling the balance — that’s because it’s not like your typical utility bill. It’s all part of a system called net metering, which is the foundation of how your solar true-up bill works. Net metering is a billing system that credits you for the extra energy your solar panels generate and send to the grid. On sunny days when your system produces more than you use, those extra kilowatt-hours don’t go to waste. Instead, they get banked as energy credits. Then, when your system isn’t producing enough (like at night or during cloudy days), you draw electricity from the grid and use up those credits. Ideally, the goal is to break even. To balance out what you send and what you take. But unless you’ve got a solar setup that perfectly matches your usage patterns, there will likely be some leftover difference. That’s what the true-up bill is for. It calculates all of it, once a year.

When is a Solar True Up Payment Made?

Your true-up payment is due at the end of your solar billing year, which is based on the month your system was activated, not the calendar year.

So, if your solar system went live in April, your true-up bill will arrive the following April.

Can you change your true-up month or payment date?

That depends entirely on your utility provider. I know that some companies, like PG&E, allow you to change it once. There may be others, but it’s always best to check directly with your utility to be sure.

What is the Difference Between My Monthly Bill and My True-Up Statement?

Under a typical electric billing setup, you’re charged each month based on how much energy you used during that billing period. Plain and simple.

But if you’re on an annual true-up schedule, it works a little differently.

Your utility will still send you a billing statement each month, but mainly to show a running tally of your energy credits and debits so you can keep track. You’re allowed to accumulate and spend those credits throughout the solar billing year.

That said, you typically won’t have big charges to pay — just the fixed monthly costs like connection or meter fees and service charge, which often range from $15 to $30 depending on the utility.

Because of that, your bills can feel pretty low most of the year, until the annual true-up arrives with the full reconciliation.

If your system didn’t produce enough, and especially if you’ve been steadily drawing more from the grid than expected, it’s absolutely possible for the final true-up bill to total in the hundreds or even thousands of dollars

So, it’s no surprise that many homeowners are caught off guard by the amount they’re charged with — unless, of course, they’ve been keeping an eye on those monthly statements.

How is a Solar True-Up Bill Calculated?

Calculating a solar true-up bill involves simple addition and subtraction, based on a few core principles:

  • If you used more power than your system produced (and burned through all your credits), you’ll owe the utility.
  • If you sent more than you used and still have credits, some utilities may pay you a small rate for the surplus — or simply roll it into the next cycle, depending on the program.

Let’s crunch some sample calculations.

Example 1: You Overproduce (You Earn a Credit)

MonthEnergy Used from GridEnergy Sent to GridNet UsageCredit/Debit
January600 kWh300 kWh+300 kWhOwe for 300
February500 kWh450 kWh+50 kWhOwe for 50
March400 kWh600 kWh-200 kWhEarn credit
April300 kWh700 kWh-400 kWhEarn credit
May200 kWh800 kWh-600 kWhEarn credit
June250 kWh750 kWh-500 kWhEarn credit
July300 kWh600 kWh-300 kWhEarn credit
August350 kWh500 kWh-150 kWhEarn credit
September400 kWh400 kWh0Break even
October500 kWh300 kWh+200 kWhOwe for 200
November600 kWh250 kWh+350 kWhOwe for 350
December650 kWh200 kWh+450 kWhOwe for 450

Total Yearly Grid Usage: 5,050 kWh

Total Energy Sent to Grid: 5,850 kWh

Net Energy: -800 kWh

In this example, you’ve produced more than you’ve consumed. You’re likely eligible for a net surplus compensation, although at a lower rate than you’d normally pay for electricity.

Example 2: You Underproduce (You Owe the Utility)

MonthEnergy used from GridEnergy Sent to GridNet UsageCredit/Debit
January700 kWh300 kWh+400 kWhOwe for 400
February600 kWh250 kWh+350 kWhOwe for 350
March550 kWh400 kWh+150 kWhOwe for 150
April500 kWh450 kWh+50 kWhOwe for 50
May450 kWh500 kWh-50 kWhCredit
June500 kWh550 kWh-50 kWhCredit
July600 kWh600 kWh0Break even
August650 kWh550 kWh+100 kWhOwe for 100
September600 kWh450 kWh+150 kWhOwe for 150
October650 kWh400 kWh+250 kWhOwe for 250
November700 kWh350 kWh+350 kWhOwe for 350
December750 kWh350 kWh+400 kWhOwe for 400

Total Yearly Grid Usage: 7,250 kWh
Total Energy Sent to Grid: 5,150 kWh
Net Energy: +2,100 kWh (deficit)

In this case, your solar system didn’t cover your entire usage over the year. You owe for the net 2,100 kWh at the utility’s current rate — say $0.30 per kWh — that’s $630 due at the time of true-up.

Why Is My True Up Bill So High?

If your true-up bill is so high, the most common reason is that your system didn’t produce as much energy as you consumed.

Other reasons include the following:

  • Seasonal changes. Longer winters mean extra need for heating, and scorching summers often lead to extra AC use.
  • Increasing household energy use. Maybe you bought an EV, added a pool pump, or had family move in. Or, you might have used energy during expensive peak hours (on time-of-use plans)
  • Undersized solar system. This means your system wasn’t sized properly at the beginning.

What Happens If My True Up Bill Is Negative?

If your true up bill is negative, that means your system sent more power to the grid than you pulled. You’ve got a surplus!

And depending on your utility, they may:

  • Pay you a small compensation. Most export rates are lower than the retail price of electricity, though, so don’t expect a massive check. Still, this is the best case scenario.
  • Roll over the credit to next year
  • Keep the excess without paying. This is the worst case scenario. Might seem unfair, but yes, most utilities wipe out any remaining credits after the 12-month cycle.

How to Lower Solar True Up Bill

One should realize that the goal isn’t to eliminate the true-up bill entirely, but to keep it predictable and manageable. Here’s what I recommend:

  • Track your monthly statements. Watch how much you’re sending and using, and keep a close tab of it to spot unusual usage patterns or shortfalls early.
  • Adjust your usage habits. Run heavy appliances during peak solar hours, and avoid drawing from the grid during peak hours.
  • Consider installing a solar battery. If your utility offers limited or unfavorable net metering, a battery lets you keep more of what you generate, instead of sending it back for pennies. That stored energy can lower the amount you owe when your solar true-up bill arrives.
  • Regularly monitor your system. Checking your system performance from time to time helps you identify issues early, like drops in production or inverter errors. If your system underperforms and you don’t notice, your true-up bill can climb quickly.

Build the Right Solar Setup, Lower Your True Up Bill

As I mentioned earlier, the best way to keep your solar true-up statement low is to match your solar production with your actual energy use. And that starts with smart planning and a design tailored to your home.

At Avail Solar, we take that seriously — not just in the design stage, but through the installation and maintenance too. Our goal is to make your solar transition easy and hassle-free, so you can go about your day without stressing over the details. Request a quote today!

Posted in Solar 101

Nevada ranks in the top 10 U.S. states with the most solar installed. So it’s no surprise I get a lot of questions about net metering in Nevada. And chances are, if you’re about to go solar, you’re probably wondering what’s in it for you as well. In this guide, I’ll walk you through how the credit system works, what to expect on your energy bill, and whether it’s something worth getting excited about (Spoiler: It probably is).

How Does Net Metering Work in Nevada?

Net metering works like a power-sharing agreement between you and your utility company. 

When your solar panels produce more electricity than your home uses — especially during those sunny afternoons when you’re out and your home isn’t using much electricity — you send that surplus power back to the grid. In return, your utility gives you “energy credits”.

You can then use these credits “pay” for the electricity you draw from the grid when the sun isn’t shining, like at night or on gloomy, overcast days.

Now, let’s zoom in a bit more on how net metering plays out specifically here in Nevada.

Net Metering is Required Under State Law

Nevada law actually requires public utility companies to offer net metering. Thanks to Assembly Bill 405 (AB 405) — also known as the Renewable Energy Bill of Rights — utilities like NV Energy must provide energy credits for surplus solar production.

This law was passed in 2017 after earlier changes from Senate Bill 374 (SB 374) caused some friction in the solar community. The Public Utilities Commission of Nevada (PUCN) was given the job of implementing this policy and regulating how utilities credit solar customers.

What this means for you is simple: If you install solar, the utility can’t ignore you. They’re required by law to let you participate in net metering and to pay you — through credits — for your excess energy.

How do you get in on Nevada’s net metering setup?

If you’re installing solar panels, your solar installer usually takes care of enrolling you in the net metering program as part of the overall setup. They’ll submit the paperwork to your utility provider, and once approved, your system gets connected to the grid with net metering enabled.

And if you’re wondering if you can still participate in net metering if you’re leasing your solar panels instead of owning them? The short answer is yes. However, the contract may come with a few conditions, so make sure to read the fine print or ask your provider how the credits are handled.

NV Energy Net Metering Policy

As the state’s primary investor-owned public utility, NV Energy delivers electricity to around 90% of the population. Whether you’re in Las Vegas, Reno, Henderson, Sparks, or Carson City, there’s a big chance they’re the ones sending you your monthly electric bill.

And that’s exactly why we’re giving NV Energy its own spotlight here. Since they serve the lion’s share of Nevadans, understanding how they handle net metering will likely answer most of your questions. (Don’t worry, though — we’ll still talk about other local utilities in a minute.)

Here’s a breakdown of how NV Energy’s net metering setup works.

Net Metering Tier System

NV Energy uses a tiered structure for net metering. The amount of credit you get for the excess electricity your panels send to the grid depends on when your system was installed.

Since June 2020, new net metering customers have been placed under Tier 4, which offers an excess energy credit (EEC) rate listed in NV Energy’s official schedule of ¢8.544 per kilowatt-hour (kWh).

This export credit rate is about 79% of the current retail electricity rate of ¢10.865 — though keep in mind, rates can change year to year, so the export credit tends to hover around 75% of whatever the current retail rate is.

To put it into perspective, let’s say your home sends 500 extra kilowatt-hours (kWh) back to the grid in a month. Under NV Energy’s current Tier 4 rate, you’d earn about $42.72 (500 × 0.08544) in energy credits. That’s real value you can apply to your next bill.

It may not be the full, dollar-for-dollar retail rate, but I’d say it’s still a pretty good arrangement, especially considering that many utilities in other states usually pay only about half the retail rate for excess energy. Even better is that this rate is locked in for 20 years from the time your system is activated. That means your credit rate stays the same year after year, even if utility prices shoot up (which they usually do). What Happened to Tiers 1–3? Previously, NV Energy used a stepped approach to phase out full retail net metering. Here’s how it worked:  

TierEECRate % of RetailStatus
Tier 1$0.1082395%Closed
Tier 2$0.1002588%Closed
Tier 3$0.0922881%Closed
Tier 4$0.0854475%Open (No Cap)


Each of those earlier tiers had an 80-megawatt cap, and once that threshold was reached, the program moved to the next tier with a slightly lower payout. 

Customers who subscribed in those earlier phases are grandfathered in and still enjoy their original locked-in rates for 20 years.

Today, Tier 4 is still open — and unlike the previous tiers, it has no cap. That means if you’re going solar now, you’re not racing the clock or cutoff dates to claim your rate.

Net Metering for TOU Pricing Plan

NV Energy also gives you the option to enroll in a Time-of-Use (TOU) pricing plan. This changes how you’re billed for electricity — and how much you earn for your solar exports — based on the time of day and season.

Here’s how TOU affects your export credits (Tier 4):

Time PeriodExport Credit Rate (EEC)
Winter (all hours)$0.06186 / kWh
Winter REVRR$0.05229 / kWh
Summer On-Peak$0.36948 / kWh (what you pay)
Summer Off-Peak$0.05404 / kWh (what you earn)
Summer REVRR$0.04525 / kWh
 

As you can see, TOU export credits are lower than the flat Tier 4 rate discussed earlier. However, you may still benefit overall if you shift your energy usage to off-peak hours (like running appliances at night or early morning).

How It Appears on Your Bill

Let’s say your panels produce 1,000 kWh in a month, but you only used 800 kWh. The 200 kWh difference will show up as a credit on your bill. So, if next month is cloudy and your panels only generate, say, 600 kWh while you use 800 kWh, you can apply the 200 kWh credit and essentially break even.

Over the course of a year, this back-and-forth evens out your costs and helps keep your energy bills low.

However, bear in mind that this doesn’t mean you won’t be receiving a bill anymore.

There are still basic service charges, the Universal Energy Charge (UEC), and other small fees (you can find them in NV Energy’s official rate schedule) — and those might add up to around $20 more or less each month.

How Net Metering Works for Other Local Utility Providers

Not every Nevadan is under NV Energy. If you’re in a smaller town or city with its own municipal electric utility, the setup can be a bit different. Below are three municipal utility providers and how they approach net metering.

Boulder City Electric

If you send more energy to the grid than you use, you get energy credit for the difference — but based on the city’s average wholesale energy cost, which is usually much lower than the retail rate.

This average cost changes and is recalculated periodically:

  • Every February for summer months (May to October)
  • Every August for winter months (November to April)

As of writing, the wholesale energy cost (¢6.24) is roughly 70% of the retail rate (¢9.01) based on Boulder City’s current residential rates.

Valley Electric Association (VEA)

Based on their latest Distributed Generation (DG) policy, VEA compensates surplus solar energy sent back to the grid depending on when you installed your solar system.

For new residential solar systems (installed after August 30, 2024), a net billing arrangement will apply. Export credits is equal to the avoided cost, which include market energy prices plus transmission costs.

All that’s to say the worth of those credits is not fixed and can vary over time. So, you get paid a wholesale-style rate for excess energy.

That said, VEA doesn’t always publish up-to-date export credit rates on their website. So it’s a good idea to check in from time to time or contact them directly for the latest figures.

Overton Power District

OPD’s net metering policy works similarly to standard net billing terms: If your solar panels generate more energy than you use that month, the extra kWh is credited to your account and shows up on the next month’s bill, calculated at Overton’s average energy cost (not retail).

That means the value of your credits will generally be lower than what you pay for electricity.

However, the good thing about OPD’s approach is that, if, at the end of the year, your solar system generated more than you used overall, OPD will buy back the remaining surplus (although still at their average energy cost).

This is definitely a plus, because some utilities simply wipe off your leftover credits with no compensation at all.

But to prevent people from treating the grid like a profit center, they cap that year-end buyback at $150.

If you’re not with NV Energy — or with one of the three utility providers mentioned — make sure to check directly worth checking directly with your local utility instead to see how they handle solar credits. The math changes depending on where you live, and your ROI might shift a bit too.

Are There Other Incentives Available for Net Metering Customers in Nevada?

Yes, there are other incentives available for net metering customers in Nevada.

First and foremost, you can claim the Solar Tax Credit, which basically knocks off 30% of your upfront cost as a tax deduction. So if your system costs $20,000, you’re really looking at a net cost of around $14,000 after that credit shows up in your taxes.

If you’re thinking of adding a battery, NV Energy currently offers rebates for home battery storage systems. The amount varies depending on whether you’re a time-of-use customer, but it’s worth exploring if blackout protection is important to you.

Ready to Go Solar in Nevada?

There’s no question that net metering can save you hundreds (sometimes even thousands) each year. And those savings really help you gradually chip away at your upfront cost, stacking up over time and getting you to your break-even point sooner.

If you’re ready to shave a big chunk off your electric bills, get in touch with a certified installer. At Avail Solar, we handle everything — from the paperwork to the installation and even the maintenance — so you can go on with your day worry-free. Request a quote today!

Posted in Solar 101

Solar energy is a viable alternative because it’s renewable, plentiful, and cost-effective. Unlike fossil fuels, which are finite and volatile, solar comes from a source that rises every single day. It doesn’t need fuel, doesn’t release carbon when it runs, and it’s already saving homeowners real money. Even so, maybe you’re not convinced, and a part of you might still be wondering: Is solar really as great as they say? Or is it just another one of those things that looks good on paper but isn’t as practical as it seems? Let’s walk through the facts together and get into the real reasons solar is more than just a trend.

Solar Power is Renewable and Practically Limitless

This may sound wild, but the fact is this: The sun beams down more energy in one hour than the world uses in an entire year.

One hundred seventy-four Petawatts (PW) of solar energy are received by Earth every second. In one hour, that’s 622 Exawatts (EW) of energy. In 2023, the world consumed around 172,222 terawatt-hours (TWh) of energy — or about 172 exawatt-hours (EWh), according to the Energy Institute’s Statistical Review of World Energy.

To bring it all together, that means just one hour of sunlight delivers over three times more energy to Earth than humanity consumes in a year.

So, if you’ve ever wondered why it feels like we’re not using more of it, it’s not because we’re short on sunlight. We’re just short on ways to capture it.

Solar Energy is Clean and Eco-Friendly

Solar energy is what experts call “clean energy”, meaning it produces electricity without releasing pollutants into the air or water.

Unlike fossil fuels, it doesn’t require drilling, mining, or burning, which means no greenhouse gases, no toxic runoff, and no smoke-spewing smokestacks.

In fact, according to an Intergovernmental Panel on Climate Change (IPCC) report, over its full lifecycle, solar leaves behind a carbon footprint 20 times smaller than coal — an energy source that remains one of the most widely used, yet also one of the dirtiest.

This helps slow climate change, reduces air pollution, and, just as important, gives nature some breathing room from all the strain we’ve put on it.

Solar Is a Proven, Long-Term Energy Solution

Solar isn’t new, and it’s definitely not some fringe movement. In fact, globally, solar PV has been the fastest-growing source of electricity for the 18th consecutive year, growing 24% in 2022 alone.

Here in the U.S., solar isn’t slowing down either. Over the last decade, solar electricity generation has grown 7.8-fold, and more than 4 million solar systems have been installed on homes across the country.

These aren’t test pilots or early experiments. They’re fully functioning, long-term energy systems used by everyday homeowners.

I know, I know. I’ve thrown a lot of numbers your way. But that’s the point. If solar weren’t a proven solution, we’d be seeing a drop in installations and slowing growth. Instead, the opposite is happening, and year after year, the numbers keep climbing.

And if all that growth doesn’t prove solar is here to stay, consider that most panels last 25 to 30 years, and many come with warranties that guarantee their performance for just as long.

Solar Works in Cloudy or Snowy Climates

Think you need Arizona sunshine to make solar work? Think again.

Take New York, one of the cloudiest states in the U.S., for example. Despite seeing more cloudy days than clear ones, it remains one of the most solar-active states.

That’s because panels don’t need direct, blazing sunlight to work. On cloudy days, they still capture diffuse light, operating at 75% to 85% of their usual output.

And snow? Believe it or not, it can actually help your system perform better. Fresh snow reflects more sunlight onto your panels (via the albedo effect), and cold temperatures keep them operating efficiently.

If you’re worried about damage, solar panels are built to withstand heavy snow loads (even hail), pouring rain, and high winds. Most are installed at just the right angle to let snow slide off naturally.

Solar is One of the Most Cost-Effective Energy Options Today

Let’s talk money, because, at the end of the day, one of the biggest factors in going solar comes down to the cost. And there are really three things worth knowing here:

  1. Once installed, solar has near-zero operating costs.

No need for fuel and no need for constant upkeep. After you’ve made the upfront investment, the cost to produce electricity is practically zero. That’s a big contrast from fossil fuels, which come with ongoing fuel expenses and operational overhead.

  1. Solar reduces peak time energy costs.

If you’re on a time-of-use (TOU) pricing plan, your utility charges more during high-demand hours like late afternoons when everyone’s running their AC — that just happens to be when solar panels are working hardest!

So instead of pulling expensive electricity from the grid, your system is producing it right when you need it most.

  1. The cost of solar panels has dropped dramatically.
    Upfront costs are the main concern for most people, because the truth is, home solar isn’t exactly cheap. On the bright side, solar is a lot more affordable now than it used to be.

The Solar Energy Industries Association (SEIA) claims that “the cost to install solar has dropped by nearly 40% over the last decade”, from around $40,000 in 2010 (before incentives) to roughly $25,000 today. That means homeowners today pay way less per watt than they would’ve years back.

And speaking of value, you’ll be glad to know what’s coming next because this next point is where solar really starts making a difference for your wallet…

Solar Saves You Money and Can Even Pay You Back

Here’s the part everyone wants to know: Will solar actually save me money?

Short answer? Yes, and here’s how:

  • You can claim 30% of your installation costs as a federal tax credit. So if your system costs $21,000, you could knock $6,300 right off your tax bill. Instant savings.
  • You can earn extra by selling Solar Renewable Energy Credits (SRECs). For instance, New Jersey’s SREC-II program pays homeowners a fixed amount for every kilowatt-hour their system produces.
  • If this program isn’t available where you are, you can take advantage of other performance-based incentives, rebates, or buyback programs available in your area.

Lastly, let’s not forget the real estate side: Homes with solar panels add value to your home and sell for up to $9,000 more, according to Zillow. That said, going solar can still be a smart route even if you’re planning to move soon or only stay for the short term.

Solar Helps Protect You From Rising Utility Rates

This, I believe, is where a lot of the value in solar really lies.

According to data from the Federal Reserve Bank of St. Louis, the average price of electricity in U.S. cities has risen from about 13.4 cents in 2020 to over 17.3 cents per kWh in 2024. That’s a jump of nearly 27% in just four years.

With solar, you’re not at the mercy of those unpredictable rate hikes. Instead, you’re locking in what you pay for power for the next couple of decades.

Sure, there may be some variability due to natural panel degradation. But even at year 25, most panels still produce around 80% of their original output — and that’s not bad at all!

What’s more is that most people hit their breakeven point somewhere between 8 to 12 years. After that, the savings keep coming in, and you’re free to enjoy electricity with little to no monthly cost.

Solar + Storage Gives You More Energy Independence

When the power goes out, most homes go dark. But not homes with solar and a battery.

If you install battery storage (like a Tesla Powerwall or SolarEdge Energy Bank), your system can keep running even when the grid shuts down. That’s a big deal, especially when you want to stay powered during wildfire-related blackouts or similar emergencies.

Solar Supports Local Jobs and the Economy

From the crew that installs your panels, to the local businesses that support the supply chain, to the customer service reps who walk you through your system — your solar project keeps people employed, right here at home.

In fact, more than 250,000 Americans worked in the solar industry in 2023 — a 5.9% increase from 2022, according to the Interstate Renewable Energy Council (IREC). And that number is expected to keep growing, especially as more families switch to solar.

Now, you might think, “Okay, that’s nice — solar creates jobs. But what does that have to do with me?”

The more solar grows, the more stable and affordable it becomes. More demand means more competition, better pricing, and more innovation.

That said, who knows, maybe your system will soon be generating power at night or storing extra energy in compact, cube-sized batteries you can stack like Legos. Only time will tell.

Solar Is More Accessible Than Ever

Remember when only the super rich or ultra green could afford solar? That era is long gone.

Today, there are thousands of certified solar installers across the U.S. You can choose to pay upfront, finance, lease, or even join a community solar program if your roof isn’t suitable.

And thanks to efforts by the Department of Energy and state-level programs, permitting and paperwork hurdles are gradually being reduced, making it easier and faster to go solar than ever before.

That’s even more true with many solar companies also operating as EPCs — handling everything from planning and installation to maintenance.

We’re proud to offer exactly that here at Avail Solar. If you want your home solar installation handled by professionals while you stay hands-off, get in touch! Request a quote or give us a call today to speak with one of our solar experts.

Posted in Solar 101